May 16, 2026
How Much Does Bathtub Refinishing Cost?
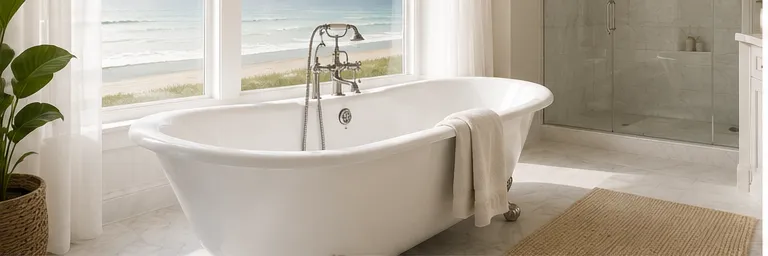
What does bathtub refinishing cost? Real pricing factors, ranges, and how to save vs. replacement. Free quote, 850-204-9300.
Read more →
BathMasters Blog
How fiberglass tub and shower cracks are professionally repaired. DIY warnings, warning signs, and when to call a pro.
By Mike Tiedman · May 16, 2026

Fiberglass tubs and showers crack. It's not a defect. It's how the material behaves under decades of weight, temperature swings, and flex. The question isn't usually whether your fiberglass tub will eventually develop a crack, it's what to do when it does. This guide covers why fiberglass cracks happen, why DIY kits almost always fail, how professional repair actually works, and when a crack means the tub really does need to be replaced.
Fiberglass is a composite: resin reinforced with glass fibers, formed over a gelcoat surface. Three things commonly cause cracks:
Flex from weight. Standing in a fiberglass tub deflects the floor of the tub slightly. Over thousands of cycles, that flex creates stress lines, especially if the tub wasn't fully supported underneath during installation. Tubs installed without a proper mortar bed are particularly prone to stress cracking in the floor.
Temperature stress. Hot water hitting cool fiberglass, then draining, then heating again (repeated thermal cycling) slowly weakens the gelcoat and underlying resin. This is most visible around drain areas and where hot water first contacts the surface.
Impact. A dropped shampoo bottle, a fall in the shower, or a heavy object dropped on the floor of the tub can crack the gelcoat. Sometimes the impact crack is obvious. Sometimes it's a hairline that doesn't show up for months as it slowly widens.
In high-use environments (vacation rentals in Destin and Gulf Shores, military housing turnover bathrooms, hotel rooms) the wear adds up faster. Fiberglass cracks are one of the most common reasons property managers and rental owners call us.
You can buy fiberglass repair kits at any hardware store or auto parts store. They contain a small bottle of resin, some hardener, and instructions that make the process sound straightforward. They rarely produce a lasting repair on a tub or shower. Here's why:
We've stripped and redone plenty of failed DIY fiberglass repairs across the Gulf Coast. By the time we see them, water has often gotten behind the patch and started to delaminate the surrounding gelcoat, which means the repair area is now larger than the original crack.
A real fiberglass repair is a structural rebuild of the damaged area, blended into the surrounding surface so it's not visible afterward. The basic process:
1. Assessment. Determine the extent of the crack, whether moisture has gotten behind it, whether the underlying structure is sound. Some cracks look small on the surface but extend further than they appear. 2. Prep. Open the crack, remove any damaged or delaminated material, ensure the repair area is clean and dry. 3. Structural fill. Layered fiberglass cloth and resin to rebuild structural integrity from the back side of the surface where accessible. 4. Gelcoat application. Color-matched gelcoat applied over the structural fill, building back the original surface profile. 5. Sand and polish. Feather the repair into the surrounding surface so the edge transition is invisible. 6. Optional full refinish. If the tub is showing age beyond just the crack, the entire tub can be refinished after the crack repair, leaving a uniform like-new finish across the whole surface.
The result, done properly, is a repair that's both structurally sound and visually invisible.
Not every fiberglass tub is worth saving. Replace rather than repair when:
We'll tell you honestly when we see one of these. Pushing a borderline repair just to make a sale doesn't help anyone. The repair fails, you call back unhappy, and we've wasted both of our time. After 26 years, we'd rather give you the straight answer.
Different surface, different repair process. For chips and cracks on porcelain, enamel, or acrylic surfaces (including porcelain-coated cast iron clawfoots) see our bathtub chip and crack repair page. The repair materials and techniques are different, but the principle is the same: real prep, proper materials, and color-matched finish.
Standalone fiberglass crack repairs are typically well below the cost of a full tub replacement. Pricing depends on the size of the crack, accessibility, and whether the repair is being done as a standalone fix or combined with a full refinish of the tub or shower. For specifics, see our bathtub refinishing cost guide or send photos for a free same-day quote.
26 years of fiberglass repair experience across the Gulf Coast. Same-day quotes, no deposit, 5-year residential warranty.
May 16, 2026
What does bathtub refinishing cost? Real pricing factors, ranges, and how to save vs. replacement. Free quote, 850-204-9300.
Read more →
May 16, 2026
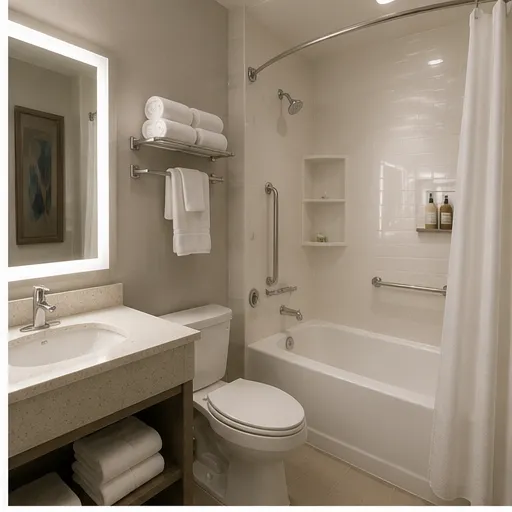
Why hotels choose refinishing over replacement: cost per unit, turnaround time, off-hours scheduling. Volume pricing available.
Read more →

May 16, 2026
15+ years with proper care. What affects bathtub refinishing durability and how to make your refinished tub last longer.
Read more →